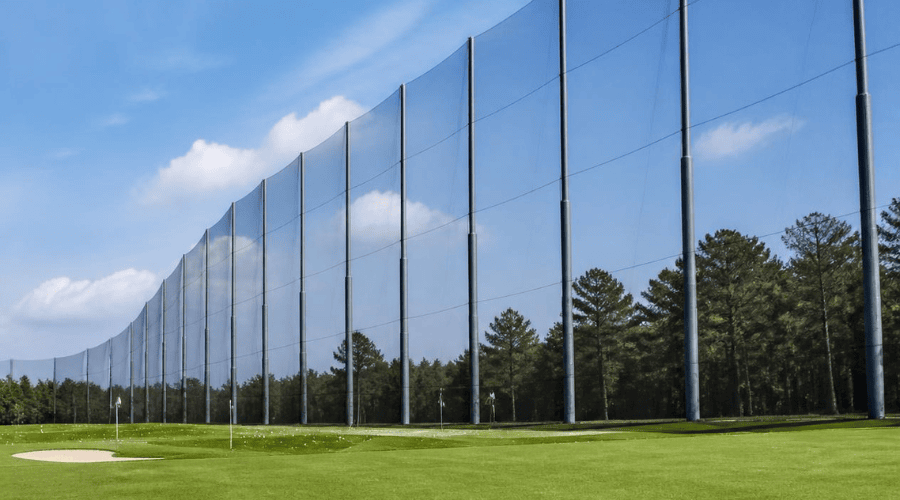
Golf Range Net Replacement: How to Choose the Right System for Your Facility
You walk out to the range and see it right away. A tear in the netting. A section sagging lower than it should. Maybe a ball came through where it never has before. Whatever caused it, one thing is clear: this needs to get handled, and it needs to get handled right.
Key takeaways:
- Netting damage, especially on older net, is often a sign of material failure or poor quality rigging, not just bad luck
- There’s no single “best” netting material. The right choice depends on your pole height and pole spans
- Larger lineal footage ranges tend to favor Dyneema, since the savings from fewer poles usually outweigh the extra material cost. Dyneema allows spans of 75’ o/c
- Shorter, less expensive poles usually favor polyester or nylon
- A short checklist of your own numbers gives you a strong starting point for a conversation with a netting partner
Most of what’s written about golf netting jumps straight to comparing materials, as if there’s one obvious winner. That’s not quite how the decision actually works. This guide walks through what really drives the right call for your specific golf range net replacement, and gives you a clear way to bring that recommendation to whoever signs off on it.
Replacing It the Same Way Isn’t Always the Right Call
You just found the damage. Maybe it was a storm. Maybe it was loose rigging that caused the area to wear through. Either way, there’s a hole in your netting, and every hour it stays that way is an hour of risk you’re carrying.
Your first instinct is probably to fix it fast, and fix it the way it was before. That makes sense. It’s what got you here in the first place.
But here’s what’s worth pausing on. If your current netting is nylon, the damage you’re looking at might not be bad luck. It might be the material doing exactly what nylon does outdoors over time.
Nylon breaks down faster in sunlight than most people expect. It’s a bit like a phone battery that still shows 100% but doesn’t hold a charge like it used to. Nothing on the outside tells you it’s happening. According to industry testing, outdoor nylon webbing can lose 25 to 40% of its tensile strength within just six months of continuous sun exposure.
How much protection your netting actually has usually comes down to one thing: how the UV resistance was built in.
Is your nylon or polyester made from solution-dyed yarn? That’s when UV protection runs throughout the yarn, not just coated on the surface. You need an inhibited yarn, where UV protection is added to the material while it’s still liquid, before it’s extruded into fiber. The same goes for the rope and twine used to border the net.
So if you patch it and move on, you’re not really fixing the problem. You’re buying a little time before the next tear.
Quick take: if your netting is nylon and it’s failing after just a few seasons outdoors, that’s not bad luck. That’s the material reaching the end of what it was ever built to handle.
If you’re standing in front of damaged netting right now and trying to figure out whether this is a quick patch job or a sign your whole system needs a second look, you don’t have to guess. A site assessment usually gives you a straight answer within a day.
What Actually Determines the Right Replacement
So, what’s the real question underneath all of this? It’s not “which netting material is the best.” It’s “what does my range actually need.”
Answer that wrong, and it costs you, in either direction. Pay for premium netting a 50-foot range didn’t need. Or go cheap on a 150-foot structure that needed more strength than that. Same root cause both times: picking a material before looking at your own numbers.
A lot of what you’ll find online treats one material as the universal winner. In practice, that’s not how the decision actually works. What really drives the right call is your specific setup, mainly how tall your poles are and what each one costs to put in the ground.
The Pole Height and Cost Scenario
Let’s make this practical. Picture two very different ranges. The height and cost of your driving range poles are what decide the answer more than anything else.
Range one has tall poles, something like 150 feet, and each pole runs close to $100,000 to install. That’s a serious structure. In a setup like this, Dyneema netting usually makes the strongest financial sense. Dyneema pulls significantly less wind drag than conventional netting, which is what lets the poles sit farther apart. Engineers who study wind loads on mesh structures have found the same thing holds true across the board, the more open and lightweight the material, the less strain it puts on whatever’s holding it up.
In Netex’s own certified wind tunnel testing, that meant cutting drag by roughly 40 to 50%, from the 12 to 16% range typical of conventional netting down to about 9.4%. Less drag means less strain on the poles, which means the poles can be spaced much farther apart. On a typical 800-foot range, that can mean going from 17 poles per side down to about 11.
When each pole costs close to six figures, removing 6 to 8 of them from the project isn’t a small saving. It’s often enough to more than offset the higher cost of the Dyneema netting itself.
Range two looks completely different. Shorter wood poles, maybe 50 feet tall, running around $4,000 each. Here, the math flips. Even though Dyneema likely still reduces wind load at this height, the savings from removing a few $4,000 poles just doesn’t add up to much. In this case, polyester or a heavier-grade net usually makes more sense for this kind of golf netting installation, without giving up the durability your range actually needs.
That’s really the heart of it. There’s no single “best” material sitting out there waiting to be discovered. There’s a material that fits the range you’re actually standing on.
Quick take: tall, expensive poles tend to favor Dyneema because the pole savings do the heavy lifting. Shorter, cheaper poles tend to favor polyester or a heavier net, because there’s not enough pole cost to offset.
Proof This Isn’t Theoretical
This isn’t just a spreadsheet exercise. It’s already played out in the real world.
One clear example: Riverway Golf Course, part of the City of Burnaby’s system, installed Dyneema netting on a 100-foot structure back in 2012, one of the earliest facilities to adopt it. Burnaby liked the results enough to bring Dyneema to their second course, Burnaby Mountain, as well.
This example isn’t meant to suggest the logic only applies in one region. Netex works with facilities across different countries, and the same pole-height and cost math holds regardless of where a range happens to sit. We’re using Burnaby here simply because it’s one of the clearest, longest-running examples we can easily reference.
A Tip From the Field: When you’re comparing a facility’s numbers to a case study like this one, don’t just match pole height. Match the full picture, height, per-pole cost, and how many poles the layout actually needs. A shorter range with unusually expensive poles can land in Dyneema territory too, even if it doesn’t look like the textbook example at first glance.
Quick take: the Burnaby case shows this kind of investment holding up over time, and it’s one example among many. Wherever a range sits, the same pole-height and cost math is what decides whether Dyneema earns back its premium.
A Quick Materials Primer
Finding the best netting for driving range facilities starts with understanding the materials themselves. Quick refresher on the main types of golf netting, since we’ve been talking mostly about pole economics so far.
- Nylon was the old standard, but it doesn’t hold up well outdoors. It absorbs water and weakens fast in sunlight, which is exactly the failure we walked through earlier.
- Polyester is the reliable workhorse. It resists UV damage well, holds its strength, and works fine for a lot of standard setups. Its main tradeoff is weight, since a heavier net adds more wind load to the poles supporting it.
- Dyneema is the high-performance option among modern sports netting materials. It’s lighter, pulls far less wind drag, and lets poles sit much farther apart, which is the whole reason it can pay for itself on the right facility. Independent materials research on UHMWPE fiber, the fiber class Dyneema belongs to, confirms the exceptional strength-to-weight ratio behind these performance claims.
If you want the deeper technical rundown, breaking strength, UV resistance data, full pros and cons, we’ve laid all of that out in our complete materials guide. This article stays focused on the part that decides your actual outcome: how your pole setup and your material choice work together.
Quick take: the materials themselves aren’t the hard part. Matching one to your specific range is.
What to Do Next: A Practical Checklist
Once you know the logic, putting it to use is pretty straightforward. Before you bring a recommendation to your ops director, here’s what’s worth having in hand.
- Measure your pole height. Not roughly, the actual number. This is the single biggest factor in whether Dyneema pays for itself.
- Find out what each pole actually costs. Installation, materials, labor, all of it. This is the number that makes the Dyneema-versus-polyester math real instead of theoretical.
- Count your current poles, and check the spacing. This gives you a baseline to compare against a wider-spaced Dyneema layout.
- Note how old your current netting is, and what it’s made from. If it’s nylon and it’s more than a couple seasons old, some of what you’re seeing as “damage” might actually be expected wear for that material.
- Write down what triggered this. A storm, a specific tear, ongoing sagging. This helps your netting partner tell you quickly whether you’re looking at a patch, a partial replacement, or a full golf ball barrier netting system upgrade, including custom golf cages where needed.
Quick take: four numbers, pole height, per-pole cost, current pole count, and netting age, are usually enough to walk into a conversation with a netting partner and get a straight answer, not a sales pitch.
With those in hand, you’re not guessing anymore. You’re bringing your range’s actual numbers to the table, and that’s what gets you a recommendation built around your facility instead of a generic one.
Frequently Asked Questions
How do I know if it’s a repair or a full replacement?
Start with the checklist from the section above. If the damage is a single, isolated tear on newer netting, a repair may be enough. But if your net is nylon and showing wear after just a couple of seasons, or the damage is spread across multiple sections, that’s usually a sign of material failure rather than one-off bad luck, and a full assessment is worth the time.
Is Dyneema worth it for every driving range?
Not automatically. As we outlined above, it comes down to your specific pole height and per-pole cost. On tall, expensive pole systems, the reduced pole count usually pays for the higher material cost. On shorter, less expensive poles, polyester or a heavier net often makes more financial sense.
How long does the netting actually last?
It depends on the material and how it’s cared for, but there’s a real gap between options. Netex’s own Dyneema netting carries a 15-year warranty against UV degradation, with a projected life expectancy of more than 25 years. Nylon, as covered earlier, can start losing significant strength within its first year outdoors.
Can I mix materials across different sections of my range?
In some layouts, yes, but it depends on your site’s specific engineering needs, pole spacing, and wind exposure across different sections. This isn’t a DIY call. It’s worth having an installer walk your actual layout before deciding.
Conclusion
Damaged netting can feel like an emergency that needs an immediate answer. It’s worth taking a breath before reaching for the same fix that was already there.
The real decision comes down to your range’s own numbers: how tall your poles are, what each one actually costs, and how many you’re currently working with. Tall, expensive pole systems tend to make Dyneema worth the investment, since the pole savings do the heavy lifting. Shorter, less expensive setups usually make more sense with polyester or a heavier net. Neither option is universally “better.” Each one is better for a specific golf facility netting replacement, and now you know how to tell which one is yours.
You don’t need to work this out alone, or guess your way into a recommendation. Share your pole height, pole cost, and current netting details, and we’ll tell you plainly which direction makes sense for your range, before you spend a dollar on the wrong fix.
About the Author
Mark Wilson is the founder of Netex Netting (Netex Canada Netting Inc.), a global leader in golf and baseball netting systems. With 47 years of net fabrication expertise, including 30 years working specifically on golf ranges, he pioneered low-drag Dyneema® golf nets and designed integrated pole, lighting, and turf solutions. He also developed the Dyneema® #15, the thinnest-diameter, lowest-wind-drag twine used on backstop safety nets at every MLB park today, earning certified wind tunnel test approvals along with the first-ever certified burst and break strength testing for a baseball backstop net. Netex delivers precision installations worldwide and stands behind them with industry-leading warranties.